How to Design an Indoor-Outdoor Flow That Works Year-Round
The most successful indoor-outdoor environments are not those with the coolest couches and the best looking fire pit on the patio, they are the ones in which someone carefully considered and mastered things like water, wind, heat loss, and structural load long before setting the first tile. Get them wrong and you’ve got a stunning room you can only occupy 1/3rd of the year. Get them right and the distinction between the two conditions becomes wonderfully, blissfully thin.
The wall has to go first
The beginning of every wide-span opening is defined by a structural issue, not a design one. Essentially, if that outside wall is load-bearing (which is the case for most single-story and many double-story houses) you’re not simply making a hole in it. You’re taking whatever load it was supporting and moving it somewhere else, typically onto a structural steel beam or a set of RSJs designed to span the new opening.
Many renovation budgets are exceeded at this point because the size of the beam depends on what it’s supporting above: either the roof load, a second story, or the wind uplift in exposed areas. A four-meter opening below a single-story roof is a different engineering task than a six-meter opening that supports a bedroom above it. The beam needs to be sized by a structural engineer, and they will also specify the foundations or posts that take that load down to the ground, plus you need building consent before making any cuts.
The second part of this is if you’re close to the sea. Salt-laden air corrodes fasteners, brackets, and exposed steel connections more rapidly than most individuals imagine. BAL ratings in fire-prone regions or coastal fringe areas will also determine the type of glazing and decking products you can even use. This is exactly the type of job where having experts on your side pays off. Local design and construction teams who undertake structural home renovations redhead will know your wind load requirements, the exact corrosion-resistant hardware needed, and your local council’s setback rules, saving you the trouble of resubmitting plans halfway through the approval process.
Getting the floor level dead flush
A flush threshold may appear to be smooth and simple, but the reality is quite different. We keep the floor levels lower inside openings than outside them for an essential reason: to prevent rainwater from entering the building. Eliminate this step, and you immediately require an alternative method to stop water.
Introducing linear threshold drainage. It’s a sleek slot drain concealed beneath a minimal grate right at the door line, and it needs to be piped to fall away from the building. With adequate capacity to manage torrential rain, not just a light shower. The concrete around it should still have a slight fall away from the building or drain, ensuring the lowest footprint of the concrete is effectively a tiny rim of a saucer acting as a final moat inside your house.
Any slot drain clogged with leaves needs to be able to take more than the small debris of drizzle rainfall. The plumbing design, floor height, and pouring of the slab all need to be coordinated right at the outset.
Bi-fold or stacker doors: pick based on climate, not looks
Bi-fold doors are fan-like in their opening mechanism as panels fold neatly against the wall. One of the reasons they have become so popular is because they have the ability to open up a wall to almost 100%. However, when considering a high-performance, energy-efficient outcome these benefits are often outweighed by the operable hinging of each panel which requires a mullion and track for each, creating a framed effect even when open. Multiple tracks can reduce these mullions but require added sealing which creates a ‘step’ at floor level and potential squaring issues for the end user.
Stacker doors run on tracks and neatly stack opening panels in a cavity within a wall or alongside the opening. While there are still tracks and seals, there are far fewer neutral sightlines than a bi-fold with neatly stacked panels. A better seal is also achieved in comparison to a bi-fold due to the larger panels. Tracks for a stacker require drainage for each as opposed to the bi-fold which can have one drainage point, this drainage of a stacker track has been a point of failure historically. Stacker doors win when it comes to wind resistance and acoustic performance, therefore worth considering when choosing a high wind or low noise site. This wind rating comes due to the large panels also being supportive on top and bottom tracks. Another point of consideration is the stacking space a door requires. This space should also be covered to ensure dirt, water, and leaves do not clog tracks and privacy is maintained.
Whichever door you choose, don’t cheap out on the glazing. Standard single-pane glass in a large opening is a thermal liability. Up to 40% of a home’s heating energy can be lost, and as much as 87% of heat gained, through uninsulated windows. On a wall-sized opening, that’s not a rounding error – it’s the difference between a room that holds temperature and one that fights you every day. Double-glazed stacker doors with a thermal break in the frame cost more upfront but they’re doing real work, not just looking good.
Design the opening around the sun, not the view
Passive solar design determines where and how large your opening should be – not just the landscape beyond. In most climates, you aim to let the low winter sun penetrate deep into the living space and block the high summer sun before it reaches the glass. Eave depth and overhang placement are critical, and must be configured to your specific latitude and the sun angles at each solstice.
A correctly sized eave shades the glass in summer and allows the sun to stream in during winter. Deciduous trees or vines on a pergola do the same job seasonally, dropping their leaves in winter to let the light in and leafing up in summer for shade. Thermal mass is important here, too. A concrete slab or exposed masonry in the transition zone absorbs heat during the day and releases it at night, evening out temperature fluctuations in the room beside your new opening.
Control the outdoor microclimate, don’t just decorate it
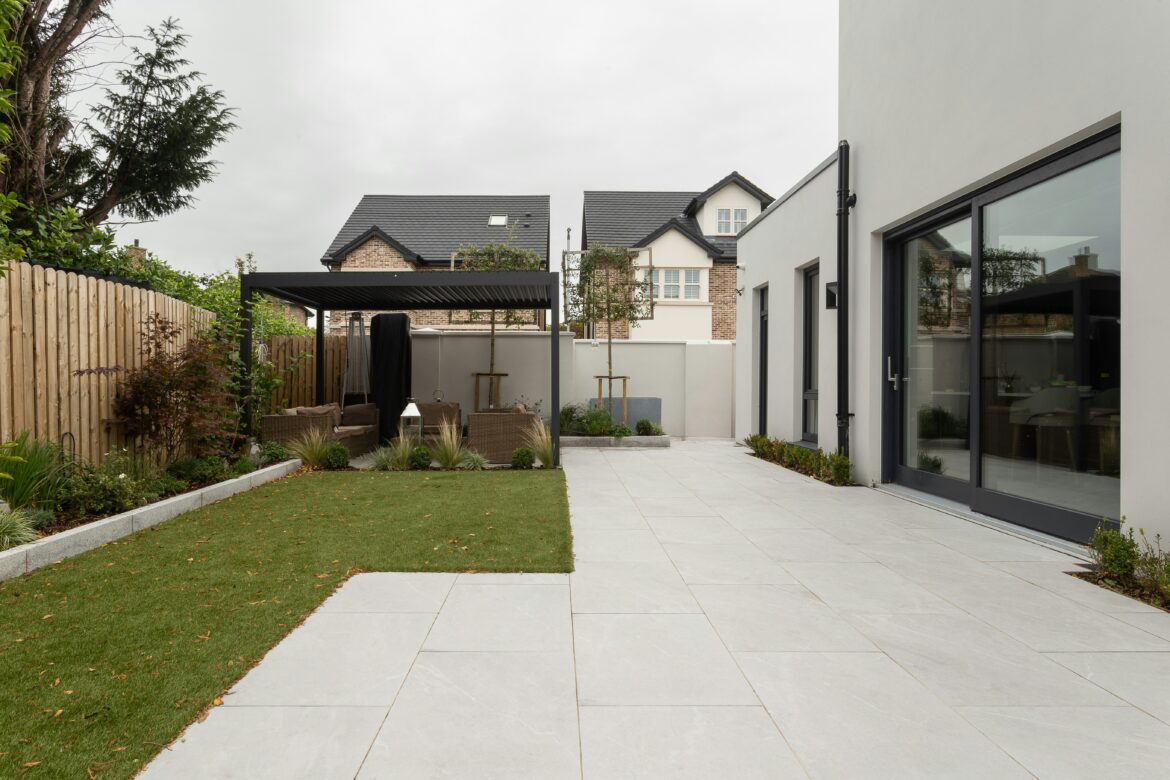
An outdoor space should be enjoyable and usable, whether it’s rainy, windy, or cold. An alfresco area that’s unusable in a stiff breeze or a summer downpour isn’t really extending your living space, it’s just a covered patio you avoid. An automated louvred pergola solves a lot of this on its own, since the blades can close against rain or open to let winter sun through, all from a switch or a phone.
Wind is the other variable people underestimate. Motorized drop-down windbreaks or fixed glass wind screens on the exposed side of a deck can turn a space that’s unusable half the year into one that works in most conditions. Ceiling fans handle the still, humid days. Radiant strip heaters mounted overhead handle the cold ones, and because they heat objects and people directly rather than warming the air, they’re far more efficient outdoors than trying to run ducted heating into an open-air zone.
None of these need to run all the time. The point is having them available so the space adapts to whatever the day throws at it, instead of being fair-weather only.
Keep the floor reading as one surface
The optical illusion that makes indoor-outdoor flow appear seamless is material consistency, and it’s mostly about exacting design rather than luxurious materials. Coordinating porcelain tiles inside with an outdoor version in the identical color and size helps the eye to view one complete surface instead of two distinct areas.
Grout lines need to be perfectly aligned between rooms. This indicates that the tiler has to organize the surface from the doorway outward in both directions before placing a single tile. If you’re using timber-look boards, have them go towards the outdoor area rather than sideways, as an interrupted board running across the sightline can noticeably segment the room.
Zone the HVAC or you’ll heat and cool the outdoors
Here’s a problem that won’t come to light until half a year post reno: the room adjacent to the new opening never gets comfortable, and the bill starts going through the roof. It’s usually because the HVAC wasn’t zoned for it.
When a living space is opened up to a massive glazed threshold that’s in constant use, that zone needs to be put on its own thermostat and made its own independent zone. Otherwise the system’s just attempting to condition a room that’s blowing air every time the doors slide open, and kills the rest of the house’s climate control in the process. A zoned system allows you to isolate that zone, push it harder when the doors are open a lot, and ease off when they’re closed, rather than the whole house having to compensate for one room’s traffic.
Plan for the mess before you plan for the aesthetic
If a pool, beach, or garden is in your plans, indoor-outdoor living ensures that sand, wet feet, and chlorine will repeatedly make their way across your new flush floor. A transition zone or informal mudroom near the principal entrance – even just a strip of hard-wearing, slip-resistant tile with a hose point and somewhere to hang towels – will insulate the rest of the house from the pool-deck experience.
This is worth designing in from the start rather than bolting on later. A dedicated wet-zone pathway keeps foot traffic contained to one durable strip instead of spreading damp sand and grit across your good floors, and it’s a lot cheaper to plan into the original layout than to retrofit once the finishes are down.
It comes down to sequencing
All of this falls apart without the right sequence. Structural engineering and drainage falls need to be decided before the slabs are poured. You need to understand wind and thermal requirements before you even think about ordering doors. Mechanical plans need to include HVAC zoning before you wall everything up. And the perfect seamless indoor-outdoor space isn’t an element you add to cap off a renovation. It’s a series of structural and building-science decisions that, ultimately, should disappear into what simply feels like the easiest house to inhabit.